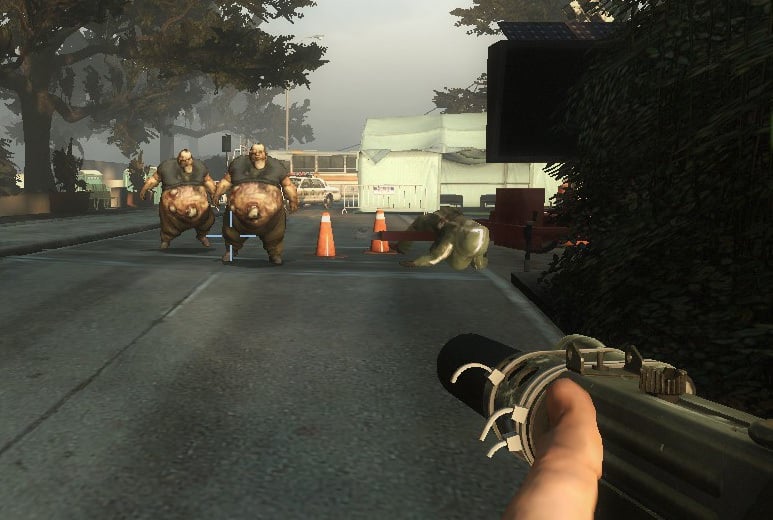
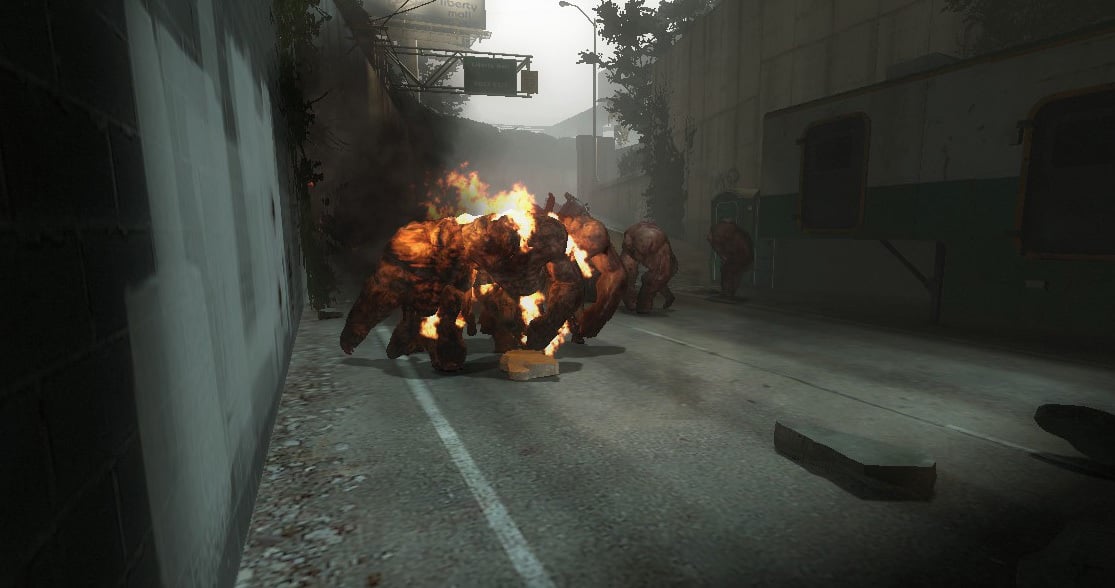
Creating Your First VSLib Mutation: BOOMER VOMIT ATTRACTS TANK HORDE
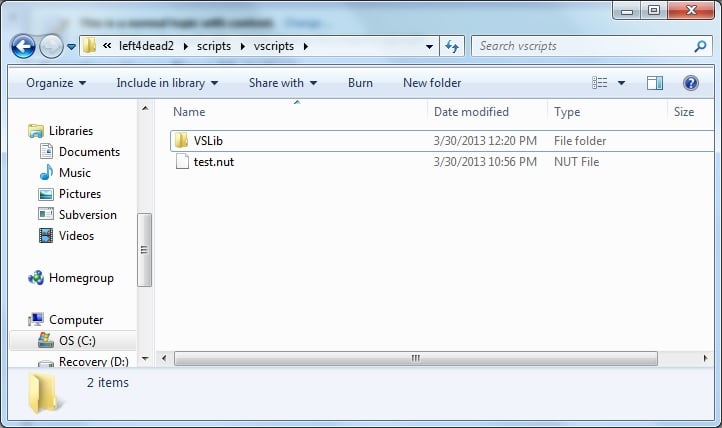
Create a file called test.nut in the following folder (if the path does not exist, create the folders):

C:\Program Files (x86)\Steam\SteamApps\common\Left 4 Dead 2\left4dead2\scripts\vscripts\

Alongside the newly created test.nut, you should see a VSLib folder if you set up everything right.
Next, create a file called test.txt in the following folder:

C:\Program Files (x86)\Steam\SteamApps\common\Left 4 Dead 2\left4dead2\modes\

Open the newly created test.txt and add the following information in:
"test"
{
	"base"		"test"

	"maxplayers"	"4"
	"hasdifficulty"	"1"
	"singlechapter"	"1"

	"DisplayTitle"	"test"
	"Description"	"A test game mode!"
	"Image"		"maps/any"
	"Author"	"test"
}
Save the file and exit.


We're almost done; so far, we have done 2 things:

We created a new game mode called "test".
We verified that VSLib is properly placed.


Lastly, if you're using the "Starting L4D2 From Notepad++" tip from the helpful addons section, be sure to change the "MutationName" to test. Your new run path might display:

"C:\Program Files (x86)\Steam\SteamApps\common\Left 4 Dead 2 Beta\left4dead2_beta.exe" -dev 3 -console -toconsole -sw +map "c1m2_streets test"

That's all there is for setting up! Let's code a simple mutation.
Coding The Mutation
Our first mutation will be utterly simple.

Let's imagine a hypothetical scenario. In this game mode, we will have only boomers and tanks. Boomer vomit will attract a horde of tanks. And there will be lots and lots of tanks once vomited. That makes for an interesting, simple game mode. Also, let's make it a single-player game mode (without bots).

Open the test.nut file with your preferred application (Notepad++, Visual Studio, etc). Any nut file that needs VSLib needs to include only 1 line. The following line will tell L4D2 to include our library:
// Include the VScript Library
IncludeScript( "VSLib" );
So far so good! Below that, we can add our mutation's options. Remember, we want only boomers and tanks-- lots of them; therefore, we will set a high limit for them, but that doesn't mean all of them will spawn at once! The L4D2 Director also sets limitations on top of your limitations (such as engine client limit, max infected players, max clients in play, etc). Add the following lines next:
// Set up mutation options
MutationOptions <-
{
	CommonLimit  = 0
 	MegaMobSize  = 0
 	WanderingZombieDensityModifier = 0
 	MaxSpecials  = 30 // Max 30 SI at once, although the actual value will be far less
 	TankLimit    = 30 // Up to 30 tanks
 	WitchLimit   = 0
	BoomerLimit  = 30 // Up to 30 boomers
 	ChargerLimit = 0
 	HunterLimit  = 0
	JockeyLimit  = 0
	SpitterLimit = 0
	SmokerLimit  = 0
	SpecialRespawnInterval = 5  // Respawn a SI 5 seconds after it dies
	cm_NoSurvivorBots = true // No survivor bots
	TotalSpecials = 15  // At least this many specials before director is done
	TotalBoomer = 15  // 15 boomers can spawn in a wave
}
Hopefully, the above code makes sense. If not, make sure you read the mutation options document. Just to summarize the above, MutationOptions is a table that L4D2 will use to determine Director related options (such as infected spawn rates). Anyway, that bit of code is not specific to VSLib. (We will actually use VSLib next.) The goal of our mutation is for lots of boomers to spawn, and when a survivor gets vomited, to spawn lots and lots of tanks.

The first thing we want to create is a round variable. Round vars are just that: variables that last throughout the round. The data inside are reset to their original value at the end of every round. For example, when all the survivors die and respawn, or when the infected and survivor teams switch (i.e. at the end of a round), or when the map changes to a different one, the round vars are reset. This is helpful because you never have to worry about resetting any value. Just set it once and forget. The variables will be fresh when a new round begins. Anyway, the variable we want to create is called DidGetVomited. DidGetVomited will start off as false (since the player who just begins the game will not be vomited). Until the player does get vomited, we want to prevent any tanks from spawning and instead spawn lots of boomers. After the player is vomited once, we want to prevent boomers from spawning and instead spawn lots of tanks. Sounds pretty complicated, huh? Don't worry. You will see that it's not so bad. To start off, create the round var below the MutationOptions table (if you're confused at any point throughout this tutorial, the full code is at the bottom of this page).
RoundVars.DidGetVomited <- false;
The next thing we want to do is kill any tank that spawns before the player gets vomited. To do so, we make use of VSLib's notification system (which wraps Valve's game event system). The notification system lets you know when things happen. For example, tanks spawning, people getting vomited, survivors dying, infected falling, doors opening, players jumping, weapons zooming, etc. Game event notifications are what tells the game when something happens. VSLib "wraps" these notifications, making them easier to use. The notification system is nice because it helps us organize code. We can have multiple functions for the same event. VSLib even passes the most useful parts of an event as parameters for you. That way, you do not have to deal with the event's parameter array yourself. If you have no idea what I'm talking about, don't worry-- you'll see very soon. Copy and paste the below into your script, and read on for the explanations:
// Below, OnTankSpawned is the notification, and KillTankIfNotVomited is the name of our function.
function Notifications::OnTankSpawned::KillTankIfNotVomited (tank, params)
{
	// If the player has not gotten vomited yet, then don't let this tank spawn.
	if (RoundVars.DidGetVomited == false)
		tank.Kill();
}
It's simple, but the syntax of the code can take a bit getting used to. Just copy and paste the above code for now. The more you see it and deal with VSLib, the easier the Squirrel code feels. Anyway, let's examine the above code in detail. The first line, in my opinion, is the hardest part. Therefore, we will spend most of our time in this paragraph examining that first line. EasyLogic is part of VSLib. The EasyLogic system enables you to incorporate "easy logic" into your map/mutation/mod. EasyLogic also attempts to replace "daunting" code with easier-to-read ones. There are lots of different things in EasyLogic, and Notifications is just one part of it. By typing Notifications::, we are accessing the Notifications part of EasyLogic. There are lots of different notifications, but all we're interested in at this moment is the OnTankSpawned notification. Thus, we end up with Notifications::OnTankSpawned. Next, we need to give a name for our notification. Basically, we need to provide a description of what we're going to achieve in that function. You can give your function whatever name you want (don't make it obnoxiously long obviously). I called my function KillTankIfNotVomited. That's the synopsis of the entire function. Note that if you wanted to, you can have as many OnTankSpawned notifications as you want. Just change the description to something else each time you use it (i.e. you can have another Notifications::OnTankSpawned::FuncNameHere if you wanted). VSLib will call all the notifications requested when they happen. For this particular notification (i.e. OnTankSpawned), VSLib will pass the tank and the original params array to us. Every notification is different, and therefore every notification will have different params. The subsequent lines are self-explanatory. If DidGetVomited is false, then kill the tank (we don't want any tanks spawning until the player is vomited on). Similarly, we don't want boomers to spawn after the player gets vomited on (we only want a horde of tanks). We will take advantage of another notification for that! This notification is called OnSpawn, and it gets called each time a survivor or infected spawns (note that we could have just used OnSpawn for both the tank and the boomer and avoided OnTankSpawned if we wanted to). The setup is nearly the same:
function Notifications::OnSpawn::KillBoomerIfAlreadyVomited (player, params)
{
	// If the survivor has already gotten vomited AND the player that
// just spawned is a boomer, then kill the boomer.
	if (RoundVars.DidGetVomited == true && player.GetPlayerType() == Z_BOOMER)
		player.Kill();
}
In the above code, if DidGetVomited is true and the spawned player is a boomer, then kill the spawned player because we do not want boomers to spawn after the survivor got vomited (we only want tanks).

Next, we want to know when the survivor gets vomited upon, so we use yet another notification! But this time it's simple:
function Notifications::OnPlayerVomited::ChangeDidGetVomited (victim, boomer, params)
{
	RoundVars.DidGetVomited <- true;
}
VSLib shares the vomited victim, attacking boomer, and the params array for OnPlayerVomited.

You can go ahead and test the script now, but there wouldn't be much action. Why? Because the tanks do not spawn in hordes! To fix this problem, we can manually spawn zombies. However, how can we specifically spawn boomers and tanks continuously throughout the round? We can use a VSLib timer; timers allow you to call any requested function after a delay or interval. Whenever a delay of any sort is needed, timers can be an effective resource. Some timers can be made to fire only once, and others can be made to fire periodically each interval. In this case, we want a timer to fire repeatedly (since we want to spawn zombies throughout the entire round). As aforementioned, timers can be used to call a function after a delay; therefore, we need two things: a function to fire and the timer itself. Now, how the heck do we create a timer? Thankfully, VSLib makes it very easy. The Timers.AddTimer function can create both repeating and single-fire timers. Here's the function prototype:

VSLib::Timers::AddTimer ( float delayInSeconds, bool repeatTimer, function functionToFire, argumentsToPass = null, unsigned int flags = 0 )

It seems pretty complicated, but it's actually very simple. You can set a delay (i.e. how long to wait before firing), whether or not you want to timer to repeat, the function to fire, an optional argument to pass (like a params table), and any optional flags. It's hard to conceptualize, but once you see it in action, it makes much more sense. So let's create the timer, the spawn function, and yet another notification (note that this notification does not have any params-- remember, every notification is different):
// The following function will spawn either a boomer or a tank near a player
::SpawnInfectedQuickly <- function ( player )
{
	if (RoundVars.DidGetVomited)
	{
		Utils.SpawnZombieNearPlayer( player, Z_TANK, 800, 512 );
	}
	else
	{
		Utils.SpawnZombieNearPlayer( player, Z_BOOMER, 800, 512 );
	}
}

// Start the timer when the player leaves the saferoom!
function Notifications::OnSurvivorsLeftStartArea::StartTheTimer()
{
	// Create the timer: (delay/interval, true to repeat, function to fire, optional param)
	Timers.AddTimer( 5.0, true, SpawnInfectedQuickly, Players.AnySurvivor() );

	// Notify the players that the round has begun
	Utils.SayToAll( "Tank Horde has begun! Don't let the boomers vomit on you!" );
}
Let's go over this code in-depth. The first function (SpawnInfectedQuickly) takes one argument: "player". Basically, what the function does is check if the player has gotten vomited, and if he has, spawn a tank near the player, or if he hasn't, spawn a boomer near him. Utils.SpawnZombieNearPlayer is a VSLib utility function that will spawn a particular Special Infected near any given player. It takes two numbers: the max distance (in this case, 800) and the min distance (512 in this case). Basically, what the code is saying is the following: "If the player has gotten vomited, then spawn a tank near the player at least 512 units away but no more than 800 units away. If the player has not gotten vomited, then spawn a boomer at least 512 units away but no more than 800 units away." By doing so, we can spawn infected a little bit far away but not too far away. The second function (the OnSurvivorsLeftStartArea notification) lets us know when the survivors leave the saferoom. When they leave the start area, we want to create a timer that repeatedly spawns infected every 5 seconds. In the end, we will have a timer that is spawning either boomers or tanks throughout the round. The function Players.AnySurvivor()  will return the first valid player (in this case, our only player). We pass the only player to SpawnInfectedQuickly as an argument. Essentially, our AddTimer function is saying this: "Create a timer that has a delay of 5.0 seconds. Make the timer fire repeatedly (every 5.0 seconds). Call the function SpawnInfectedQuickly when the timer fires, passing our only player as an argument." Thus, we will have a timer that is spawning infected near the player every five seconds until the end of the round. Cool, huh? Timers can do a lot more stuff. In the Timers chapter, we will go over timers in-depth.

Well, that's it. Go ahead and test your first mutation! As a bonus, try adding a OnTankSpawned notification and change the tank's color to red with InputColor().
The Full Mutation Code
// Include the VScript Library
IncludeScript( "VSLib" );

// Set up mutation options
MutationOptions <-
{
	CommonLimit  = 0
 	MegaMobSize  = 0
 	WanderingZombieDensityModifier = 0
 	MaxSpecials  = 30 // Max 30 SI at once, although the actual value will be far less
 	TankLimit    = 30 // Up to 30 tanks
 	WitchLimit   = 0
	BoomerLimit  = 30 // Up to 30 boomers
 	ChargerLimit = 0
 	HunterLimit  = 0
	JockeyLimit  = 0
	SpitterLimit = 0
	SmokerLimit  = 0
	SpecialRespawnInterval = 5  // Respawn a SI 5 seconds after it dies
	cm_NoSurvivorBots = true // No survivor bots
	TotalSpecials = 15  // At least this many specials before director is done
	TotalBoomer = 15  // 15 boomers can spawn in a wave
}


RoundVars.DidGetVomited <- false;


function Notifications::OnTankSpawned::KillTankIfNotVomited (tank, params)
{
	// If the player has not gotten vomited yet, then don't let this tank spawn.
	if (RoundVars.DidGetVomited == false)
		tank.Kill();
}

function Notifications::OnSpawn::KillBoomerIfAlreadyVomited (player, params)
{
	// If the survivor has already gotten vomited AND the player that
// just spawned is a boomer, then kill the boomer.
	if (RoundVars.DidGetVomited == true && player.GetPlayerType() == Z_BOOMER)
		player.Kill();
}

function Notifications::OnPlayerVomited::ChangeDidGetVomited (victim, boomer, params)
{
	RoundVars.DidGetVomited <- true;
}


// The following function will spawn either a boomer or a tank near a player
::SpawnInfectedQuickly <- function ( player )
{
	if (RoundVars.DidGetVomited)
	{
		Utils.SpawnZombieNearPlayer( player, Z_TANK, 800, 512 );
	}
	else
	{
		Utils.SpawnZombieNearPlayer( player, Z_BOOMER, 800, 512 );
	}
}

// Start the timer when the player leaves the saferoom!
function Notifications::OnSurvivorsLeftStartArea::StartTheTimer()
{
	// Create the timer: (delay/interval, true to repeat, function to fire, optional param)
	Timers.AddTimer( 5.0, true, SpawnInfectedQuickly, Players.AnySurvivor() );

	// Notify the players that the round has begun
	Utils.SayToAll( "Tank Horde has begun! Don't let the boomers vomit on you!" );
}


Be the first to post a comment!